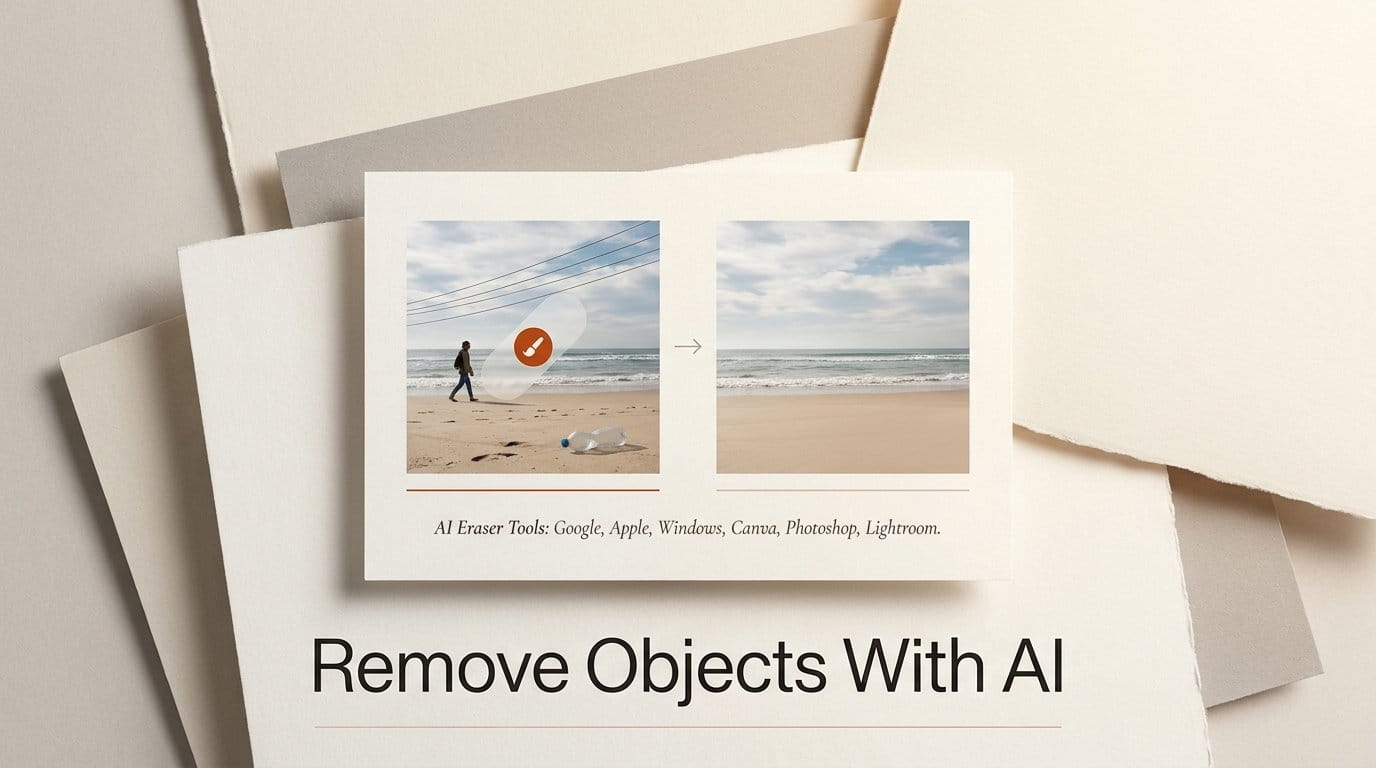
You can remove a stranger, a power line or a stray bin from a photo in under a minute with AI, and on most devices it costs nothing. Google Photos, Apple Photos and the Windows Photos app each have a free AI eraser. Canva has one inside its editor. Adobe's Photoshop Remove tool and Lightroom's Generative Remove both erase without spending a single generative credit. This guide shows which eraser fits which job, the exact taps in each app, and how to fix the smudges and leftover shadows that AI erasers tend to leave behind.
We built it from each company's own help pages, checked October 14, 2026. App menus move between versions, so if a button is not where we say, look under Edit, then Tools.
What You Need
- The photo, at full resolution. Work on the original file, not a screenshot or a copy saved from a chat app, which is usually smaller and already compressed.
- A phone eraser (free): the Google Photos app on Android or iPhone, or Apple Photos with Clean Up. Clean Up needs Apple Intelligence, which means an iPhone 15 Pro, iPhone 15 Pro Max or any iPhone 16 or later, an iPad with A17 Pro or M1 and later, or a Mac with M1 or later.
- Or a computer eraser (free): the Photos app that comes with Windows 11 and Windows 10, or Photos on a Mac.
- Optional, for designs: Canva Pro or a higher plan. Magic Eraser is not on Canva Free, and Pro costs US$144 a year.
- Optional, for professional work: Photoshop and Lightroom. Adobe's Photography plan is US$19.99 a month (annual plan, billed monthly) and includes both apps plus 1,000 generative credits a month.
- An internet connection. Lightroom's Generative Remove needs a stable one, and most of the other erasers do their work in the cloud.
Which Eraser for Which Job
Adobe's own Lightroom guidance makes a useful rule for every app: use a healing brush for tiny marks like dust spots and pimples, a remove tool for smaller whole objects, and a generative tool for large objects that leave a big hole to fill. Pick by the size of the problem, then by where your photo already lives.
| Job | Best tool | Cost | Runs on |
|---|---|---|---|
| Photobomber, bin or sign in a phone photo | Google Photos Magic Eraser | Free | Android, iPhone |
| Same job on a recent iPhone or Mac | Apple Photos Clean Up | Free | iPhone 15 Pro or later, M1 Mac or later |
| Quick fix on a Windows PC | Photos app Generative erase | Free | Windows 11, Windows 10 |
| Photo already in a thumbnail, post or slide | Canva Magic Eraser | Canva Pro (US$144 a year) | Canva on web, desktop, mobile |
| Precise control over smaller objects | Photoshop Remove tool | No credits | Photoshop |
| Tourists, bins and signs in RAW photos | Lightroom Generative Remove | No credits | Lightroom, Lightroom Classic, Camera Raw |
| A huge area to rebuild | Photoshop Generative Fill | 1 credit per generation | Photoshop |
| You would rather describe the edit | Google Photos Ask | Free for eligible users | Google Photos mobile app |
Before You Erase
Step 1: Keep the original and judge the background
Every app below lets you undo, and Apple Photos, Google Photos and Lightroom keep the original behind your edit. If the photo is going into a client job or a published post, still export a copy of the untouched file first, so you can always compare.
Then look at what sits behind the object. AI erasers invent the missing pixels from the surroundings, so a person against sky, sand, grass or a plain wall disappears cleanly, while a person standing in front of a crowd, a fence or text is much harder. If the object overlaps your main subject, expect to need the generative tools in Step 6 or Step 7.
Erase on Your Phone
Step 2: Google Photos Magic Eraser (Android or iPhone)
Google says Magic Eraser and its other AI editing tools are free for eligible Google Photos users. Open the photo, tap Edit, then Tools on iPhone or Actions on Android, and select Magic Eraser.
The app highlights distractions it has already spotted. When Google introduced Magic Eraser it named people in the background, power lines and power poles as typical finds. Tap a highlight to remove it, or circle or brush over anything it missed. If a faint outline remains, run a second pass over just that spot, then save.
Step 3: Apple Photos Clean Up (iPhone, iPad or Mac)
On iPhone, open the photo, tap Edit, tap Tools, then Clean Up. Tap, brush or circle what you want gone; some items are highlighted automatically so you can remove them with a single tap. In iOS 27, Apple's guide adds a choice of processing: tap Auto during Clean Up and pick Auto, Fast or High Quality. With High Quality, tap Clean Up to apply, then Done. To undo after saving, reopen Clean Up and tap Reset.
On a Mac, double-click the photo, click Edit, then Tools, then Clean Up. Pick the brush under Erase, set the Size slider, and click, brush or circle the object. The brush under Retouch handles dust specks and blemishes. One behavior surprises people: if you brush over a face, Apple may blur it with a pixelated effect instead of removing it.

Erase on a Computer for Free
Step 4: Windows Photos Generative erase
The Photos app that ships with Windows has an AI eraser called Generative erase, which Microsoft describes as an upgrade of its old Spot fix tool that gives a more seamless result, even when erasing large areas. Open the photo, choose Edit Image, select Erase, set the brush size and brush over the object.
To remove several things at once, turn off Auto Apply. Each area you brush then becomes a separate mask you can add or delete before the app erases them all together. If you do not see Erase, update Photos from the Microsoft Store.
Step 5: Canva Magic Eraser, for photos inside a design
If the photo is already in a YouTube thumbnail, a carousel or a slide, fix it where it lives. In the Canva editor, click the photo, click Edit, and under Tools choose Magic Eraser. Mark the object, click Erase and wait for it to process. Canva's own tip: if the object is still there, erase a slightly larger area around it. Edits made from the Projects page save as a separate file in your Uploads, so the original stays intact.
Erase in Photoshop and Lightroom
Step 6: Photoshop Remove tool
Select the Remove tool from the toolbar; if it is hidden, press and hold the Spot Healing Brush to reveal it. In the options bar, set the Size slightly larger than the object so one stroke covers it, and set Mode to Generative AI on, Generative AI off, or Auto. Adobe says generative credits are not deducted for the Remove tool, whichever mode you pick.
Brush over the object, or use the brush like a lasso: draw a loop around it and the loop closes itself when the ends meet. For something in a corner, brush from one edge of the image to the other. For a large or complicated area, turn off Remove after each stroke, paint several strokes, then apply once. Working on layers? Tick Sample All Layers.
Step 7: Lightroom Generative Remove, or Generative Fill for big holes
Photographers who edit RAW files can stay in Lightroom. Generative Remove is an option inside Lightroom's Remove tool, built on Adobe Firefly, and it works in Lightroom on desktop and mobile, Lightroom Classic and Adobe Camera Raw. Adobe's Generative Remove FAQ names tourists, trash cans and background signs as the targets, says it works on RAW and non-RAW photos without touching the original, and says it deducts no generative credits.
When the hole is large, such as a car across half the frame, select the area in Photoshop and use Generative Fill. This is where credits start: Adobe says Generative Fill typically uses one credit per generation, and many features return three variations to choose from. On the Photography plan's 1,000 monthly credits, that is a lot of fills, but unused credits do not roll over.
Describe the Edit Instead
Step 8: Ask Google Photos to do it
If brushing on a small screen is fiddly, Google Photos can take instructions. Open the photo, tap Edit, then Ask, and type what you want, for example "remove the people behind me" or "remove the wires from the sky". Google says this uses Gemini to make the edit. Because the AI is redrawing rather than patching a marked spot, compare the result with the original: check that faces, hands and text you wanted to keep did not change.
Check Before You Publish
Step 9: Zoom in, fix the leftovers, export
Zoom to 100% and scan the edited area. The usual giveaways are a shadow or reflection the eraser left behind, a soft smudge where texture should be, a repeated pattern, and straight lines (railings, horizons, tiles) that bend where the object used to be. Fix each one with a second, smaller pass, then export at full size.
One editorial rule: removing a distraction from a portrait or a product shot is retouching. Removing a person from a news or event photo changes what happened. If the image documents something real, leave it alone or say it was edited.
Troubleshooting
- The shadow stayed behind. Erasers only remove what you mark. Brush over the shadow and any reflection as part of the same selection.
- A blurry smudge instead of background. The area is too big for a non-generative fill. In Photoshop, set Mode to Generative AI on; in Lightroom, use Generative Remove; in Canva, erase a slightly larger area.
- A face turned into pixels in Apple Photos. That is Clean Up's deliberate behavior when you brush over a face. If you need a clean removal, use Google Photos, Windows Photos or Photoshop for that photo.
- Clean Up is missing. It needs an Apple Intelligence device and a supported language and region. Apple says it does not currently work on devices bought in mainland China.
- Generative Remove is slow or fails. It runs in the cloud and needs a stable connection; try again on a better network.
What to Try Next
Need the whole background gone rather than one object? See our background removal models test, or how to remove a video background with AI for clips. If the clean photo is headed for YouTube, our AI thumbnail tutorial picks up from here. And on an iPhone running iOS 27, try Clean Up's neighbor, Extend, to widen a tight crop after you have removed what was crowding the edge.
FAQ
Is there a free AI tool to remove objects from photos?
Yes. Google Photos Magic Eraser is free for eligible users on Android and iPhone, Apple Photos Clean Up is free on Apple Intelligence devices, and the Windows Photos app includes Generative erase at no cost.
Does removing objects in Photoshop use generative credits?
Not with the Remove tool: Adobe says no credits are deducted in any mode. Lightroom's Generative Remove is also credit-free. Generative Fill uses about one credit per generation.
Which iPhones can use Clean Up?
iPhone 15 Pro, iPhone 15 Pro Max and iPhone 16 models or later. On iPad it needs A17 Pro or M1 and later, and on Mac an M1 chip or later.
Can AI remove people from photos?
Yes, and people in the background are one of the things Google Photos and Apple Photos highlight automatically. Apple Photos may pixelate a face you brush over instead of removing it, so use another app if that happens.
Why does my edited photo look fake?
Usually because the background behind the object was busy, or the selection missed a shadow. Erase the shadow too, use a generative mode for large areas, and check the result at 100% before you export.