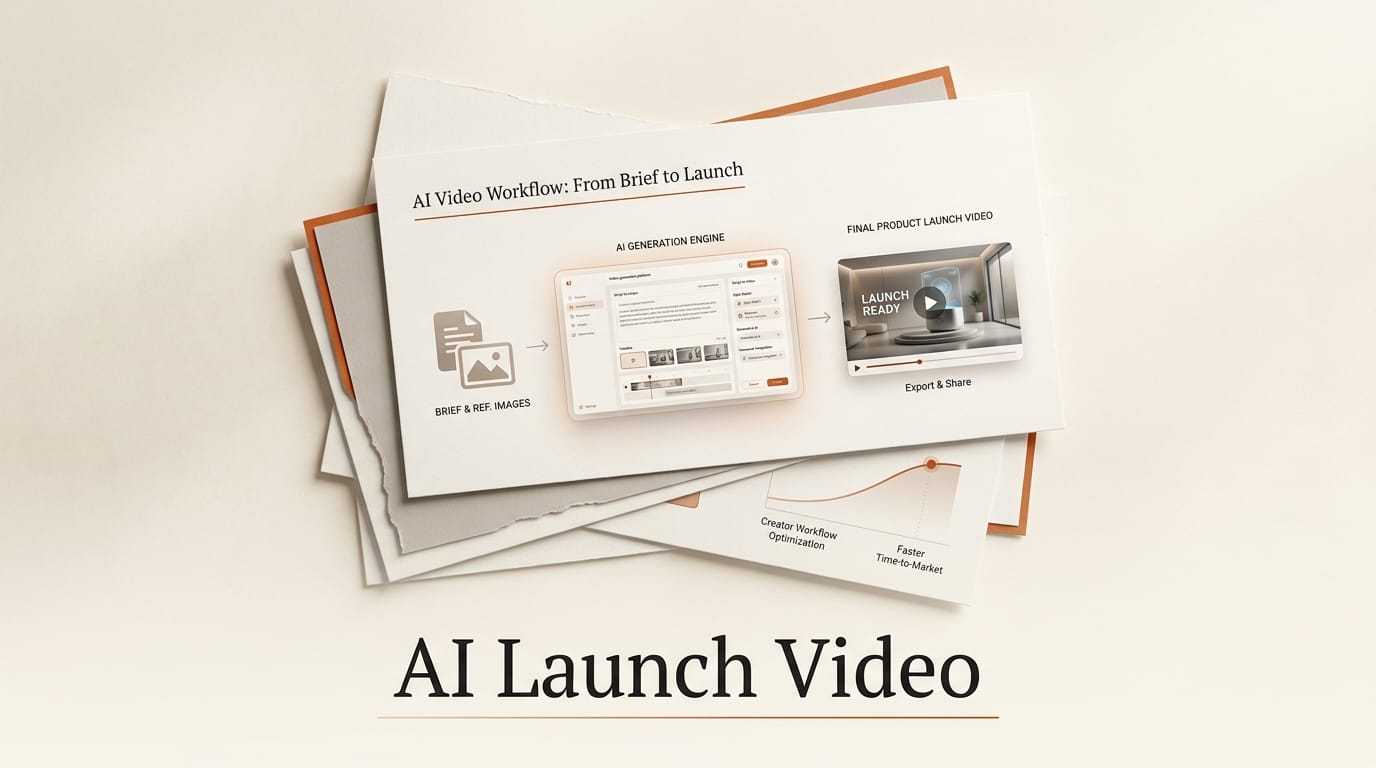
You can turn a product brief and a handful of reference images into a polished, multi-scene launch video in about ten minutes, without opening motion-design software. This guide walks the full workflow using Topview Motion Studio, an agent-driven tool that sequences your shots into a connected story, plus a couple of free helpers for voiceover and final trims. Budget roughly three dollars per render and one afternoon to dial in a version you would actually ship for a launch, a feature announcement, or an app-store trailer.
What You Need
- A one-paragraph product brief: what the product is, who it is for, and the three or four moments you want on screen.
- Three to five clean reference images: product photos, UI screenshots, a dashboard, and a logo. Motion Studio accepts JPG, JPEG, PNG, and WEBP up to 15MB each.
- A Topview Motion Studio account. It is the fourth product from Topview and launched on Product Hunt on August 30, 2026.
- Optional: an ElevenLabs account for a voiceover track and CapCut for last-mile caption and trim tweaks.
The Workflow, Step by Step
Step 1: Write a tight one-paragraph brief
The brief is the single biggest lever on the result, so treat it like a creative direction, not a form field. Name the product, the audience, and the specific beats you want in order: the problem, the reveal, one or two feature moments, and the call to action. Keep it to four or five sentences. A vague brief such as "make a cool video for my app" gives the agent nothing to sequence; a concrete one such as "open on the scheduling pain, cut to the calendar view, show the one-click booking, end on the free-trial button" gives it a shot list to build against.
Step 2: Gather three to five clean reference images
Motion Studio works from your assets, so the quality of your reference shots sets a ceiling on the output. Export UI screens at full resolution with no cursor, crop product photos tightly, and include a transparent-background logo if you have one. Three to five images is the sweet spot: enough to cover your key scenes without diluting the story. Blurry, watermarked, or low-contrast source images are the most common reason a first render looks cheap.
Step 3: Pick a motion style, duration, and aspect ratio
Choose a motion style that matches your product. Presets such as "Cinematic Product Reveal" suit a hardware or lifestyle launch, while "SaaS Workflow Demo" fits software where the point is showing the interface in motion. Set a duration between 4 and 60 seconds, and pick one of six aspect ratios from 9:16 for Reels, TikTok, and Shorts up to 21:9 for a widescreen hero on a landing page. If you are cutting one launch for several channels, render a vertical and a horizontal version rather than cropping one into the other.
Step 4: Let the agent sequence the scenes, then review the cut
Once you submit, Motion Studio hands the brief and assets to an AI agent and a dedicated motion-design skill inside its Canvas, which sequences the shots into a connected narrative rather than a set of disconnected clips. A finished video takes about ten minutes to produce. When it lands, watch it once end to end for story flow before you judge any single frame: does the opening earn attention, do the feature beats land in the order your brief asked for, and does it close on the action you want. Treat the first render as a draft to refine, not a finished cut.
Step 5: Add voiceover, captions, and final polish
Most launch clips are watched muted, so on-screen text carries the message, but a voiceover lifts the version that plays with sound. Generate a narration track in ElevenLabs from the same brief copy, then drop it and burned-in captions over the render in CapCut. This is also where you trim any dead frames, tighten the final cut to the platform you are posting to, and add an end card with your logo and link. Keep the edit light: the goal is to sharpen the AI render, not rebuild it.
Troubleshooting the Output
- Scenes feel disconnected. The brief was probably a feature list, not a sequence. Rewrite it as ordered beats and re-render.
- A product screen looks warped or off-brand. The reference image was too low-resolution or busy. Swap in a clean, full-resolution export and regenerate that version.
- The pacing is too fast. A 4-second render cannot carry four beats. Push the duration to 15 to 30 seconds so each moment has room to read.
- It reads generic. Add one specific, ownable detail to the brief, such as your actual UI copy or a signature color, so the agent has something concrete to anchor on.
- Wrong crop for the platform. Do not letterbox. Re-render in the native aspect ratio for each channel.
What to Try Next
Once you have a repeatable launch clip, branch out. Run the same brief through a prompt-first tool like Hera Launch to compare how much control you trade for speed, and keep a shortlist of general models from our best AI video generators guide for shots that need fully generated footage rather than your own assets. If your launch has a written announcement or a blog post behind it, our walkthrough on turning a blog post into a video shows how to reuse that copy as a second, longer-form asset.
Frequently Asked Questions
How much does an AI launch video cost to make?
With Topview Motion Studio, a render is quoted at about three dollars, versus the thousands of dollars and multi-week timeline a traditional motion studio would charge. Voiceover and editing helpers like ElevenLabs and CapCut have free tiers that cover a single launch.
How long does it take to produce one video?
Motion Studio reports about ten minutes of render time per video. Add fifteen to thirty minutes for writing the brief, gathering references, and doing a light final edit, and you have a shippable clip in under an hour.
What inputs does the tool actually need?
A written product brief, three to five reference images in JPG, JPEG, PNG, or WEBP up to 15MB each, a motion style, a duration from 4 to 60 seconds, and one of six aspect ratios from 9:16 to 21:9. The agent handles scene sequencing from there.
Do I need After Effects or editing skills?
No. The point of an agent-driven tool is that it handles the keyframing and shot sequencing that normally require After Effects. Basic editing skills help for the optional voiceover and caption pass, but they are not required to get a usable render.
Can one video work across TikTok, Reels, and a landing page?
Render a separate version in each native aspect ratio rather than cropping one file. A 9:16 cut suits TikTok, Reels, and Shorts, while a 16:9 or 21:9 cut is better for a landing-page hero or YouTube. Re-rendering is far cheaper than a bad crop.