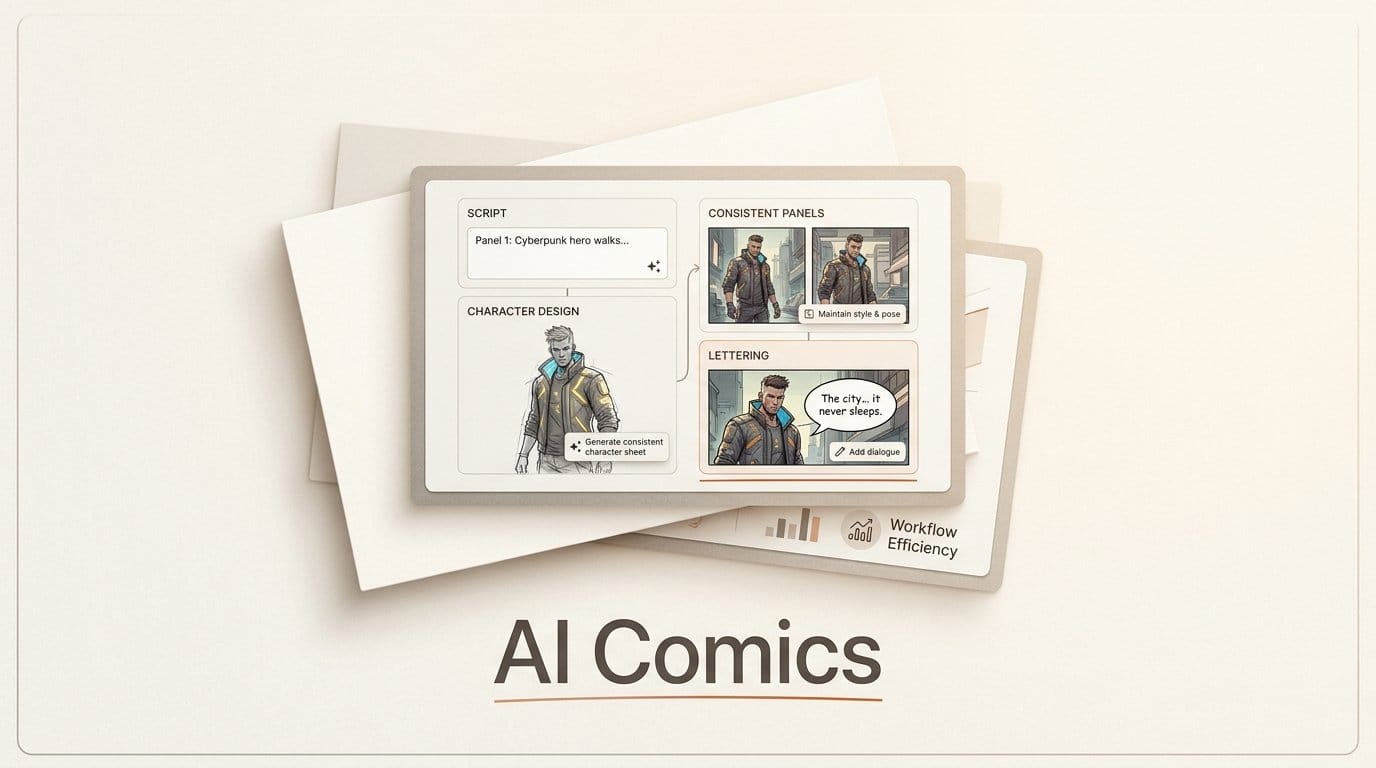
You can take a comic from a one-line idea to finished, lettered pages in an afternoon using AI image tools you already have access to. This workflow uses a large language model for the script, an image model with strong character consistency (Gemini with Nano Banana Pro, Midjourney, or open-weights FLUX) for the panels, and a layout app (Canva, Krita, or Clip Studio Paint) for pages and lettering. Budget two to four hours for a short 6 to 12 panel story, and roughly zero to fifteen dollars depending on which image tool you pick.
What You Need
Gather these before you start so you are not switching context mid-draft:
- A chat model for scripting: ChatGPT, Claude, or Gemini.
- An image model with a character or style reference feature: Nano Banana Pro inside the Gemini app, Midjourney with character reference, or FLUX run locally or through a host.
- A layout and lettering app: Canva for speed, Krita or Clip Studio Paint for real comic controls and panel rulers.
- A reference or two for your character: a rough sketch, a photo for the vibe, or a written description you will reuse verbatim.
- A page size decided up front: 2048 by 3072 pixels for a portrait page, or a 2:3 ratio for print.
Step 1: Write a Tight Script and Panel Plan
Comics live or die on pacing, and AI will not fix a shapeless story. Start in your chat model and ask it to turn your idea into a beat sheet: who is in the scene, what changes, and where the emotional turn lands. Then convert that into a panel-by-panel script.
Give each panel four fields: the shot type (wide establishing, medium two-shot, or close-up), the action, the setting, and the dialogue. A useful prompt is: "Break this scene into eight panels. For each, give shot type, action in one sentence, setting, and dialogue under fifteen words. Vary the shot types so it does not feel static." Keep dialogue short. Cramped word balloons are the fastest way to make an AI comic look amateur.
Lock the panel count and the page breaks now. Knowing you have eight panels across two pages tells you exactly how many images to generate and stops scope creep.
Step 2: Lock Your Character Design
Consistency is the single hardest part of an AI comic, and it is won or lost here. Generate a character sheet first: one image showing your character from the front, three-quarter, and side, in a neutral pose against a plain background. Write a detailed, reusable description covering age, build, hair, wardrobe, and one or two signature details, and save that text as a block you paste into every later prompt.
Then commit to a reference method. In Midjourney, use character reference to carry a face across generations. In the Gemini app, upload your character sheet and instruct Nano Banana Pro to keep the same person in each new panel, which handles identity and on-image text unusually well. With FLUX, a trained LoRA or an IP-adapter reference gives you the tightest lock for a recurring cast. Whichever you choose, keep the same seed strategy and the same wardrobe description every time. Our character consistency workflow goes deeper on locking a face across dozens of images.
Step 3: Generate Consistent Panels
Now work the script panel by panel. Build each prompt from four stacked parts: your saved character block, the shot type, the action and setting from the script, and a fixed style line you reuse across the whole comic (for example, "flat cel-shaded comic art, bold ink outlines, limited warm palette"). The fixed style line is what makes eight separate generations read as one book.
Generate a small batch per panel and pick the frame where the character is on-model and the composition leaves room for a word balloon. Do not chase perfection on every pixel. A slightly off background is invisible once lettering and page borders go on; an off-model face is not. If a panel drifts, regenerate with the character block moved to the front of the prompt and the action simplified. Leave clear negative space at the top or side of action panels for text later.
Step 4: Compose Pages and Add Lettering
Bring your chosen frames into the layout app and place them into a grid. Classic layouts work best: a wide top panel, two mediums in the middle, and a tall closer reads cleanly and guides the eye left to right, top to bottom. Add thin gutters between panels so the page breathes.
Lettering is where beginners overreach. Use one clean, legible font for dialogue and reserve a bolder face for sound effects. Draw speech balloons with real tails pointing at the speaker, keep each balloon under two short lines, and never let a balloon cover a face. Canva has drag-and-drop balloon shapes; Krita and Clip Studio Paint give you proper text tools and balloon assets with more control. Read every page aloud to check the reading order actually flows.
Step 5: Color, Polish, and Export
If you generated in a fixed style, your colors are already coherent, but a final pass unifies everything. Drop a subtle color-grade layer over the whole page so panels from different generations share one temperature. Fix obvious artifacts, extra fingers, warped text on signage, or a stray limb, with your image tool's inpainting or a quick manual paint-over. For edit-heavy cleanup, an open toolkit like FLUX for local inpainting and editing is worth having in the pipeline.
Export pages as high-quality PNG or JPG for web at 2048 pixels wide, or as a print-ready PDF at 300 DPI if you are ordering physical copies. Name files in reading order so a reader or a print service never scrambles your pages.
Troubleshooting Common Problems
The character keeps changing between panels. Move the character description to the very start of the prompt, reduce the number of other instructions, and lean harder on your reference feature. Fewer competing details means the model spends its attention on identity.
Text in the image comes out garbled. Do not let the image model render dialogue. Generate panels with empty space and add all text in the layout app, where it stays crisp and editable.
Panels look like unrelated illustrations. You are missing a fixed style line. Write one sentence describing art style, line weight, and palette, and paste it into every single prompt without changing it.
Faces or hands are distorted. Regenerate, or inpaint just the broken region rather than the whole panel. Close-ups are more forgiving than crowded wide shots, so favor tighter framing when a model struggles.
What to Try Next
Once a short strip works end to end, scale the same pipeline. Build a small cast by making a character sheet for each recurring figure and keeping a saved description block per character. Try a longer form: a six-page mini-issue forces you to plan page turns and cliffhangers. You can also branch the style, swapping the fixed style line to produce a manga, noir, or watercolor version of the same script to see which fits your story.
Frequently Asked Questions
What is the best AI tool to make a comic in 2026?
There is no single winner. Nano Banana Pro in the Gemini app is the easiest for consistent characters and clean on-image handling, Midjourney gives the most stylish art with its character reference feature, and FLUX gives you the most control if you run it locally with a trained character. Most creators script in a chat model and letter in Canva or Clip Studio Paint regardless of which image tool they pick.
How do I keep the same character across every panel?
Make a character sheet, write a detailed description you paste into every prompt, and use your tool's reference feature: character reference in Midjourney, an uploaded reference image in Gemini, or a LoRA in FLUX. Keeping the wardrobe and style lines identical across generations matters as much as the reference image itself.
Should I let the AI write the dialogue text into the panels?
No. Image models still garble longer text, and baked-in dialogue cannot be edited. Generate panels with clear negative space and add all balloons and captions in your layout app, where the type stays sharp and you can rewrite freely.
How long does it take to make an AI comic?
A polished 6 to 12 panel short takes roughly two to four hours once you know the workflow: about thirty minutes on script and character design, an hour generating and selecting panels, and the rest on layout, lettering, and cleanup. Longer issues scale from there.
Can I sell or publish a comic I made with AI?
Policies vary by platform and by tool, and copyright rules for AI-assisted work are still unsettled in several regions, so check the terms of your image tool and your publishing platform before selling. Adding your own scripting, editing, lettering, and color work strengthens your claim to the finished book.